A dial thermometer on a pipeline looks simple, yet a few degrees of hidden error can upset a heat exchanger or a batch. This guide shows how to check it against a reference, judge the error and adjust it properly.
Temperature gauge calibration compares a dial thermometer with a traceable reference at several points and records the error. The method is simple, but immersion depth, stabilisation and tolerance decide whether the result means anything.
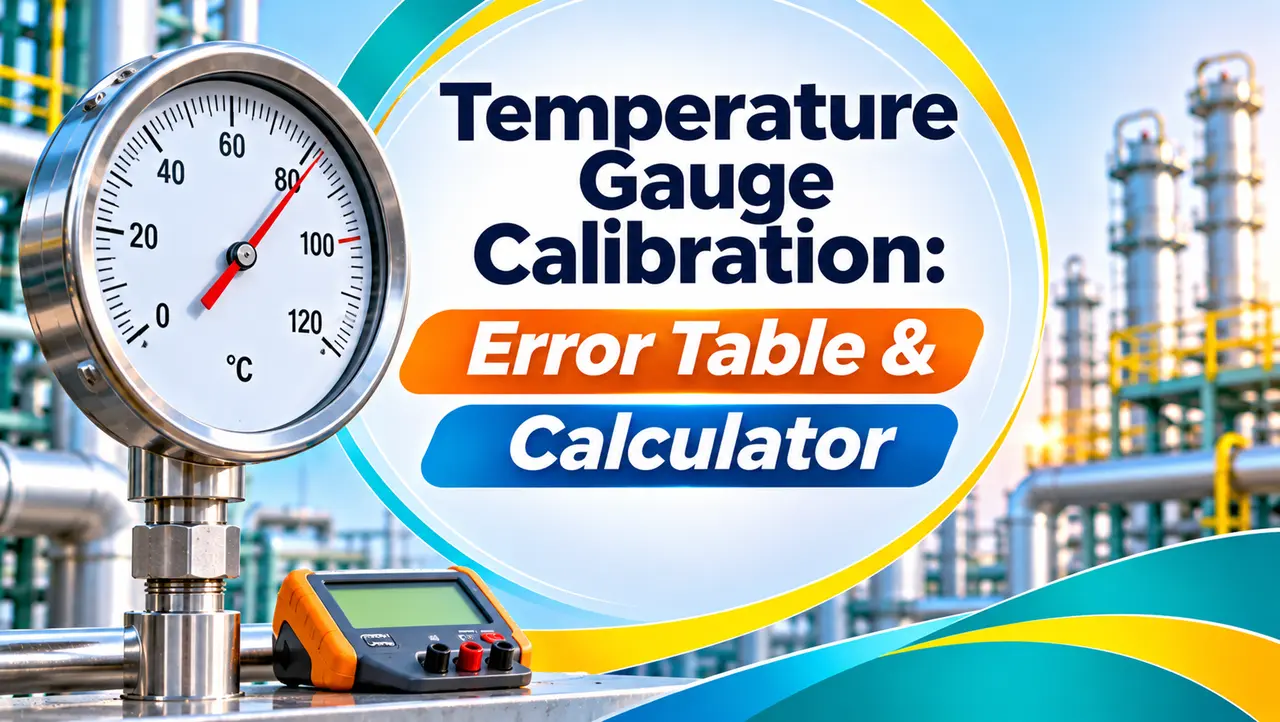
What Is Temperature Gauge Calibration?
Temperature gauge calibration is the comparison of a dial thermometer against a traceable reference thermometer at known temperatures, so you can find its error and decide whether it is within tolerance. When the error is too large, the pointer is reset or the gauge is replaced, and the as found and as left readings are recorded.
- Use a dry block or stirred liquid bath with a reference probe
- Test at least 3 to 5 points across the measuring range
- Immerse the stem fully, past the sensitive length
- Wait for stable readings before recording
- Compare the error with the EN 13190 class or datasheet limit
- Reset the pointer only if the error is a near constant offset
Dial thermometers cover two main designs, so first read how a bimetallic thermometer works and how a gas filled thermometer works. The sensing element sets how deep you must immerse it and how long it takes to settle.
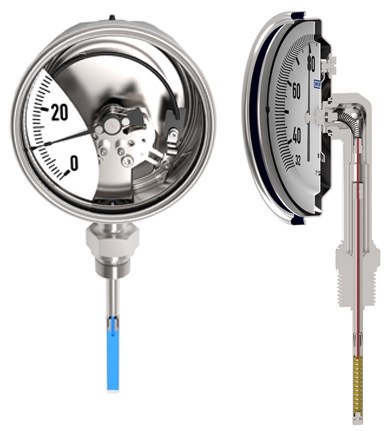
The WIKA photo shows a gas actuated thermometer beside a bimetal one. Both need the same temperature gauge calibration logic, but the gas type has a long sensing bulb that must be fully immersed.
Bimetal vs Gas Filled Dial Thermometers
WIKA writes that bimetal thermometers are generally designed for minus 70 to 600 °C when unfilled, while liquid filled bimetal units are limited to 250 °C. Gas actuated thermometers work reliably from minus 200 to 700 °C, but their ambient temperature effect must be considered.
A coiled bimetal strip in the stem twists the pointer as temperature changes, and the sensitive part sits near the stem tip.
Inert gas in a bulb, capillary and Bourdon tube expands with temperature and moves the pointer.
Silicone oil in the case damps pointer vibration on pumps and compressors.
WIKA adds that a gas actuated thermometer needs a stem of at least 8 mm and a gas filled sensor section of at least 100 mm. That long bulb is why shallow dry block wells often give low readings on these gauges.
Temperature Gauge Calibration Setup: Dry Block or Bath
For temperature gauge calibration you can use a dry block calibrator or a stirred liquid bath as the heat source, and both work best with a separate reference probe. Our guide to the dry block calibrator explains inserts and stability, and types of temperature calibrators compares the options.
- Portable and clean, easy to carry to site
- Fast heat up and cool down
- Wide range without hot oil
- Good for straight stems that fit the insert
- Better contact for odd stem sizes and bulbs
- Deep immersion for long gas bulbs
- Excellent uniformity
- Heavier and messy, mostly a lab tool
Fluke Calibration recommends probe immersion of 20 times the outer diameter plus the sensor length to keep stem conduction error small. For an 8 mm stem with a 60 mm sensitive length, that is about 220 mm, deeper than many portable wells.
Fluke Calibration showed that using an external reference probe in a metrology well cut the expanded uncertainty at 0 °C from 168.13 mK to 28.64 mK, compared with relying on the built in control sensor. The display of a well is not your best reference.
Check the TUR before you start. Your reference should be about four times better than the gauge tolerance, a rule explained in our article on test uncertainty ratio.
Temperature Gauge Calibration Procedure
Winters Instruments asks for both thermometers to be immersed at the same depth in an agitated liquid for at least three minutes before comparing readings. For bimetal stems, Winters also says to immerse past the groove on the lower part of the stem, which marks the sensitive length.
Record each point in a format like our as found and as left calibration certificate. The same structure works for the temperature switch calibration procedure if the gauge has a switch contact.
EN 13190 Accuracy Class and Error Limits
EN 13190 is the European standard for dial thermometers, and SIKA explains that it defines two accuracy classes, class 1 and class 2, with error limits that depend on the display range. The measuring range, marked by small triangles on the dial, must cover at least two thirds of the display range.
| Item | What it means | Source |
|---|---|---|
| Class 1 | Tighter error limit, common on bimetal gauges up to 250 °C | EN 13190 via SIKA and supplier datasheets |
| Class 2 | Wider error limit, often above 250 °C | Supplier datasheets |
| Measuring range | Section of the dial where limits apply, marked by triangles | SIKA |
| Gas actuated reference ambient | Class 1 held at 23 °C ± 10 °C ambient | WIKA |
| Gas filled remote gauge | ±0.5 % of full scale | Winters Instruments |
| Vapour filled remote gauge | ±2 % of full scale | Winters Instruments |
Before temperature gauge calibration, read the exact tolerance in °C from your gauge datasheet, because the standard table depends on range and class. One supplier datasheet for a bimetal gauge lists class 1 up to 250 °C and class 2 above it, so check the dial or tag before setting your limit.
Error % of span = Error ÷ (High minus Low) × 100
Solved example, range 0 to 120 °C:
Reference 80.0 °C, gauge 81.5 °C
Error = 1.5 °C = 1.25 % of span
Tolerance ±1.2 °C, so adjust or reject
A negative error shows as minus in the result, which means the gauge reads low. For more on the maths, see our calibration error calculation and the difference between zero and span errors.
How to Adjust a Bimetal Thermometer
Most industrial bimetal thermometers have an external reset screw or a small hex on the back or bottom of the case that turns the pointer. Reotemp tells users to turn the small 1/4 inch hex screw at the back of the case until the pointer reads 0 °C in an ice bath.
An adjustment only shifts the whole scale, so it fixes a constant offset but not a span or linearity error. If the error grows from low to high points, set the pointer at the most used process temperature or replace the gauge, as explained in zero and span adjustments.
Reotemp notes that the sensitive part of a bimetal compost thermometer is only the last 2 to 3 inches of the stem. Shallow immersion is the most common reason a good gauge fails calibration.
Temperature Gauge Calibration Troubleshooting
When a gauge fails temperature gauge calibration, decide whether the gauge or the setup is to blame before you adjust anything. The table lists common symptoms seen in temperature gauge calibration work.
| Symptom | Likely cause | Action |
|---|---|---|
| Gauge reads low at high points | Shallow immersion, stem conduction | Immerse deeper or use a bath |
| Reading keeps creeping | Not stabilised | Wait longer, at least three minutes |
| Same offset at all points | Pointer shifted by shock | Reset pointer and recheck |
| Error grows with temperature | Span error, aged element | Replace gauge |
| Different reading going up and down | Friction or hysteresis | Record hysteresis, replace if beyond limit |
| Gas gauge drifts with ambient | Ambient effect on capillary | Calibrate near normal ambient, check class |
Write the immersion depth used on every temperature gauge calibration sheet. When the next technician uses a shallower well, the record explains why the as found results differ.
Thermowell and installation effects can make a correctly calibrated gauge read wrong in service, so read temperature measurement errors too. To set how often each tag is checked, use the method in calibration interval determination.
- Reference probe and readout have valid traceable certificates
- TUR of about 4 to 1 or better
- Stem immersed past the sensitive length or groove
- Readings stable before recording
- As found results recorded before any adjustment
- As left results recorded at all test points
- Tag, range, class and tolerance written on the sheet
If your reference is a PT100 with an ohm readout, the RTD resistance to temperature calculator converts it quickly. For transmitters on the same loop, follow how to calibrate a temperature transmitter.
In this Fluke Calibration video you can see how a dry well heats a probe and why insert fit and depth matter. Watch it before your first temperature gauge calibration on site.
Temperature Gauge Calibration FAQ
For temperature gauge calibration, place the gauge and a traceable reference probe at the same depth in a dry block or stirred bath. Set each test point, wait for stable readings and record both values.
Calculate the error at every point and compare it with the datasheet or class tolerance. If the error is a constant offset, reset the pointer and record the as left readings.
There is no single fixed interval, because it depends on how critical the reading is and how stable the gauge has been. Many plants start with a yearly check and then lengthen or shorten it based on as found history.
Gauges on safety or quality critical duties usually get shorter intervals. Recording as found errors every time is what lets you justify any change later.
Industrial bimetal thermometers are usually sold as class 1 or class 2 to EN 13190, where class 1 has the tighter limit. The exact tolerance in degrees depends on the display range, so read it from the datasheet.
Many suppliers offer class 1 up to about 250 °C and class 2 above that. Shock, vibration and overheating can push a gauge outside its class over time.
EN 13190 is the European standard for dial thermometers that sets display ranges, measuring ranges and error limits. It defines two accuracy classes, called class 1 and class 2.
SIKA explains that the measuring range must cover at least two thirds of the display range. Small triangles on the dial mark where the error limits apply.
Fluke Calibration recommends immersion of twenty times the stem diameter plus the sensor length. For a bimetal stem, Winters says to immerse past the groove that marks the sensitive part.
Gas actuated thermometers need the whole bulb immersed, which is often longer than a portable well. In that case a stirred liquid bath is the better choice.
Yes, most industrial bimetal thermometers have an external reset screw or a small hex on the case. Turning it moves the pointer to match a reference temperature, such as an ice bath at zero.
The reset corrects only a constant offset across the scale. If the error changes from point to point, the gauge usually needs replacement.
Related Articles
- Bimetallic Thermometer Working Principle
- How Does a Gas Filled Thermometer Work
- Dry Block Calibrator
- Calibration Certificate As Found and As Left
- Test Uncertainty Ratio in Calibration
External References
- Winters Thermometers Installation, Operation and Maintenance (PDF)
- SIKA: Measuring Range and Display Range for Dial Thermometers
- Bimetallic Strip, Wikipedia
What We Learn Today
- Temperature gauge calibration compares a dial thermometer with a traceable reference probe at several points in a dry block or stirred liquid bath.
- Immersion depth and stabilisation time decide the result, so immerse past the sensitive length and wait for steady readings before recording anything.
- Compare each error with the EN 13190 class or datasheet tolerance, reset the pointer only for constant offsets, and always record as found and as left.