A pressure switch has only three terminals, yet wrong wiring on those terminals causes missed alarms and nuisance trips in many plants. This guide shows which contact to use for each duty, how to land it on a PLC or relay and how to prove it during commissioning.
Pressure switch wiring decides whether an alarm or trip works safely when pressure changes or a wire breaks. This guide covers C, NO and NC terminals, PLC and relay wiring, fail safe logic, a fault table and a setpoint calculator.

What Is Pressure Switch Wiring?
Pressure switch wiring is the way the common (C), normally open (NO) and normally closed (NC) terminals of a pressure switch are connected to a PLC input, relay, lamp or motor starter. The chosen pair of terminals decides whether the circuit is closed or open in the healthy state, which decides how safely the alarm or trip behaves.
- Most industrial pressure switches have one SPDT contact with three terminals: C, NO and NC.
- NO and NC describe the contact at shelf condition, with no pressure applied.
- On a pressure rise to setpoint, C to NO closes and C to NC opens.
- The contact resets only after pressure falls back through the deadband.
- For alarms and trips, wire the contact that is closed when the process is healthy, so a broken wire also trips.
CCS Dual Snap explains that an SPDT switch lets one source feed two separate connections, with the NO contact open in its default state and the NC contact closed.
Pressure Switch NO NC and C Terminals
Every pressure switch wiring job starts from the switching action, which the Dwyer A1F manual states clearly: on a pressure rise to setpoint, C and NO close while C and NC open. On a fall below setpoint minus deadband, the action reverses.
| Pressure condition | C to NO | C to NC | Typical use |
|---|---|---|---|
| No pressure, shelf state | Open | Closed | Defines the NO and NC names |
| Rising, below setpoint | Open | Closed | Healthy for a high switch |
| Rising, at or above setpoint | Closed | Open | High pressure alarm or trip |
| Falling, inside deadband | Stays as last state | Stays as last state | Prevents chatter |
| Falling, below setpoint minus deadband | Open | Closed | Low pressure alarm or trip |
Read the deadband row carefully, because it explains why a switch does not reset at the same pressure it tripped at. Our guide on deadband in pressure switches covers fixed and adjustable types.
The words normally open and normally closed refer to the switch sitting on a shelf, not to the running plant. A low pressure switch on a running pump header usually has its NO contact closed all the time.
Pressure Switch Wiring Diagram for PLC Input
For pressure switch wiring to a 24 V DC PLC input, the switch simply acts as a dry contact between the supply and the input terminal. Take the 24 V supply to C and return the chosen NO or NC terminal to the input, matching the sinking or sourcing type of the card.
Good pressure switch wiring leaves a spare core for the unused contact, because duties change after start up. Follow the plant standard for cable colour codes and ferrule numbers so the next technician can trace each core.
Many switches are rated for high current with silver contacts, which can become unreliable at the few milliamps a PLC input draws. For low energy circuits, ask the supplier for gold plated contacts.
Fail Safe Alarm vs Trip Logic
Fail safe pressure switch wiring means the circuit is energised and closed while the process is healthy. A broken wire, a blown fuse or a loose terminal then looks exactly like a real alarm, which suits the de energise to trip philosophy of an emergency shutdown system.
Healthy state is below setpoint, so C to NC is closed. On high pressure the contact opens and the PLC sees a 0.
Healthy state is above setpoint, so C to NO is closed. On low pressure the contact opens and the PLC sees a 0.
A closed contact may be wanted only when a condition is met, so wiring follows the control narrative.
Normally energised loops can be checked continuously, which is why most safety standards favour them. A first out alarm in the PLC then shows whether the trip came from the process or from a wire fault.
A switch wired the other way, closing to alarm, will never alarm if its cable is cut. The panel stays quiet while the plant runs without protection, which is why auditors check the contact choice.
Pressure Switch to Relay and Motor Circuits
The Dwyer A1F snap switch is rated 15 A at 120, 240 or 480 V AC, so it can switch a small load directly. Larger motors need a contactor, and a remote PLC often gets its signal through an interposing relay.
For pressure switch wiring through a relay, put the switch in series with the coil and use the relay contacts for the load. Fit a suppression diode or RC network across DC or AC coils, and consider a solid state relay where switching is frequent.
Setpoint and Reset Formula With Solved Example
The reset point is the setpoint minus the deadband for a high switch and the setpoint plus the deadband for a low switch. Margin to trip shows how close normal operation sits to the setpoint.
Setpoint = 6.00 bar rising, deadband = 0.50 bar
Reset = 6.00 minus 0.50 = 5.50 bar falling
Operating pressure = 4.80 bar
4.80 is below 5.50, so C to NC is closed
Margin = 6.00 minus 4.80 = 1.20 bar
Margin % = 1.20 ÷ 6.00 × 100 = 20.0 %
Fail safe contact for a high switch: C to NC
If the margin is very small, normal pressure ripple will cause nuisance alarms, and a pressure snubber or a higher setpoint may be needed. Setting methods are covered in our note on setpoint and deadband configuration.
Pressure Switch Wiring Troubleshooting Table
Most pressure switch wiring faults show up during the first loop test or after maintenance; use this table with a multimeter and a hand pump.
| Symptom | Likely cause | Check | Fix |
|---|---|---|---|
| Alarm active with healthy pressure | Wrong contact used, open wire | Continuity C to NC and C to NO at the switch | Move core to correct terminal, repair cable |
| No alarm when pressure crosses setpoint | Setpoint drifted, contact welded, wrong duty | Hand pump test against gauge | Reset setpoint or replace microswitch |
| Alarm chatters on and off | Pressure ripple near setpoint, small deadband | Trend and gauge needle | Add snubber, widen deadband or move setpoint |
| PLC input flickers | Contact unsuited to low current, loose terminal | Voltage at input while switch closed | Gold contacts, tighten terminals |
| Trip only in rain | Water in housing or gland | Insulation test and inspection | Reseal gland, fit drain or cover |
| Switch never resets | Pressure inside deadband, blocked impulse line | Vent line and watch reset | Clear line, check isolation valve |
When testing, always measure across the terminals at the switch with the PLC cable lifted. A reading at the marshalling cabinet alone cannot separate a switch fault from a cable fault.
Testing and Commissioning the Switch
CCS Dual Snap suggests wiring the switch to a simple light box during bench tests, so the change of state is visible while you watch the gauge. In the field, the same check becomes part of the instrument loop check, signed off with the operator.
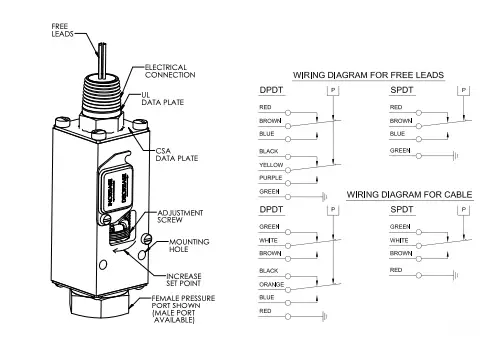
The Dwyer manual also asks for the switch to be mounted within 20 degrees of vertical, away from high vibration, with the green earth screw connected. In hazardous areas, check the certificate and choose between flameproof and intrinsically safe wiring methods before you start.
Pressure Switch Wiring Myths
Pressure Switch vs Transmitter for Alarms
Many plants now replace switches with transmitters, but pressure switch wiring remains common for simple, independent protection. Our detailed comparison of pressure switch vs pressure transmitter explains the trade offs.
- Simple, low cost and easy to wire.
- Needs no analog card or configuration.
- Can switch a small load directly.
- Independent of the control system software.
- No live value, so drift is hidden until tested.
- Mechanical parts wear and setpoints shift.
- Contacts can stick after long periods without change.
- Needs regular proof testing to stay reliable.
- Duty confirmed as high or low, alarm or trip
- Contact closed in the healthy state chosen
- Contact rating and material suit the load
- Earth screw connected and gland sealed
- Unused terminal insulated and labelled
- Setpoint and reset tested against a gauge
- PLC alarm confirmed on loss of signal
Dwyer A1F Pressure Switch Manual PDF
Video on Pressure Switch NO and NC Connection
Pressure Switch Wiring FAQ
Identify the C, NO and NC terminals, then take the supply to C and the load or PLC input from the chosen contact. Connect the earth screw and seal the cable gland properly.
Pick the contact that is closed while the process is healthy for alarms and trips. Finally, test the switching point with a hand pump and a calibrated gauge.
A normally open contact is open when no pressure is applied and closes when pressure rises to the setpoint. A normally closed contact does the opposite and opens at the setpoint.
Both share the common terminal in an SPDT switch. The names always describe the shelf state, not the condition during normal running of the plant.
The common terminal is usually marked C or COM and is the moving part of the contact. It connects to either the NO or NC terminal depending on the pressure.
Check the label inside the cover or the manual, because terminal numbers differ between makers. A continuity test with no pressure applied confirms which terminal is closed to common.
For a low pressure alarm or trip, the NO terminal is normally used with common. On a running line, pressure is above the setpoint, so that contact stays closed while the process is healthy.
When pressure falls, the contact opens and the PLC sees the alarm. A broken wire also opens the circuit, which makes this pressure switch wiring fail safe.
Isolate and vent the switch, lift the wires and set the meter to continuity. With no pressure, common to NC should read closed and common to NO should read open.
Apply pressure with a hand pump and watch the reading change at the setpoint on a test gauge. Release the pressure slowly to confirm the reset point and the deadband.
Take 24 V DC from the PLC supply to the common terminal and return the chosen contact to a digital input. Match the wiring to a sinking or sourcing input card.
Program the alarm to act when the input goes to zero, so wire breaks are caught. Use gold contacts or a suitable low current switch for reliable signals.
Deadband is the difference between the pressure at which the switch trips and the pressure at which it resets. It stops the contact chattering when pressure hovers near the setpoint.
A high switch set at 6 bar with 0.5 bar deadband resets at 5.5 bar. Some switches have a fixed deadband, while others let you adjust it.
Related Articles
- What Is a Pressure Switch
- Deadband in Pressure Switches
- Pressure Switch Setpoint and Deadband Configuration
- Pressure Switch vs Pressure Transmitter
- Sinking and Sourcing in PLC
External References
- Series A1F Compact OEM Pressure Switch Instructions, Dwyer Instruments
- How to Wire, Test and Install a Pressure Switch, CCS Dual Snap
- Pressure Switch, Wikipedia
What We Learn Today
- Pressure switch wiring uses three SPDT terminals: on a pressure rise to setpoint, C to NO closes and C to NC opens.
- For fail safe alarms, wire the contact that is closed in the healthy state: C to NC for high pressure and C to NO for low pressure.
- The switch resets only after pressure crosses back through the deadband, so check both the setpoint and reset point with a gauge.