Table of Contents
ToggleLearning to read and draw electrical and control panel drawings is one of the most important skills for any student or beginner in the electrical and instrumentation field. Without knowing how to read these drawings, it is very difficult to understand how machines, motors, or control panels actually work.
In this blog, I will give you a step-by-step simple explanation of electrical drawings, wiring diagrams, and control panel schematics.
Along with that, you will also find our YouTube video lessons embedded inside this post so that you can watch and practice directly.
By the end, you will be confident in reading and drawing your own basic control circuits.
Its all FREE !!
Why Electrical Drawings are Important?
Electrical drawings are like the language of engineers and technicians.
They tell us:
- How wires are connected.
- Which device is connected to which terminal.
- How current flows through a circuit.
- How protection devices (MCB, MCCB, fuses) are placed.
- How motors, VFDs (Variable Frequency Drives), and soft starters are wired.
Imagine trying to repair or build a control panel without a drawing. It would be like driving in a city without a google map!
That’s why drawings are very important.
Types of Electrical Drawings
Before we go further, let us understand the different types of electrical drawings that you will come across:
- Wiring Diagram – Shows how each wire is connected between components.
- Schematic Diagram – Focuses on the function of the circuit, not the physical layout.
- Single Line Diagram (SLD) – Simplified diagram showing only one line for each circuit.
- Control Panel Layout Drawing – Shows the physical arrangement of devices inside the panel.
In your training, we will mostly focus on schematics and wiring diagrams, as these are the most useful when learning control panels.
How to Read Electrical Drawings & Wiring Diagrams
Watch this first video
Step 1: Start with the Power Supply
Look for where the incoming supply is shown. For example:
- 230V AC single-phase
- 415V AC three-phase
This tells you what type of circuit you are studying.
Step 2: Identify the Main Equipment
Check what is being controlled:
- A motor
- A heater
- A pump
- A VFD (Variable Frequency Drive)
- A soft starter
Step 3: Trace the Current Flow
Follow the circuit step by step—from the breaker → contactor → overload relay → motor.
Step 4: Understand Symbols
Every symbol has a meaning. For example:
- Circle with M = Motor
- K = Contactor
- OL = Overload relay
- Push buttons = Start/Stop
With practice, you will recognize these instantly.
How to Draw Electrical Diagrams | Wiring Diagrams Explained
Watch this second video
Now that you know how to read a diagram, let’s learn how to draw your own electrical diagrams.
What is a Wiring Diagram?
A wiring diagram shows the actual connections between devices. It is more detailed than a schematic because it includes wire numbers, terminal numbers, and connection details.
Key Steps for Drawing Wiring Diagrams
List Components
Write down all the devices in the circuit: breakers, contactors, relays, motor, switches.Draw the Power Circuit
Show the incoming supply → breaker → contactor → overload relay → motor.Draw the Control Circuit
Show push buttons, selector switches, relays, and their coil connections.Add Wire Numbers & Labels
Every wire should have a unique number for easy troubleshooting.Check for Completeness
Make sure you include fuses, earthing, and interlocks if required.
Example – Simple Motor Starter
- STOP push button (red) connected in series.
- START push button (green) connected parallel to a holding contact.
- Contactor coil (K) energized through these buttons.
- Overload relay (OL) connected to protect motor.
This forms a very basic motor starter wiring diagram.
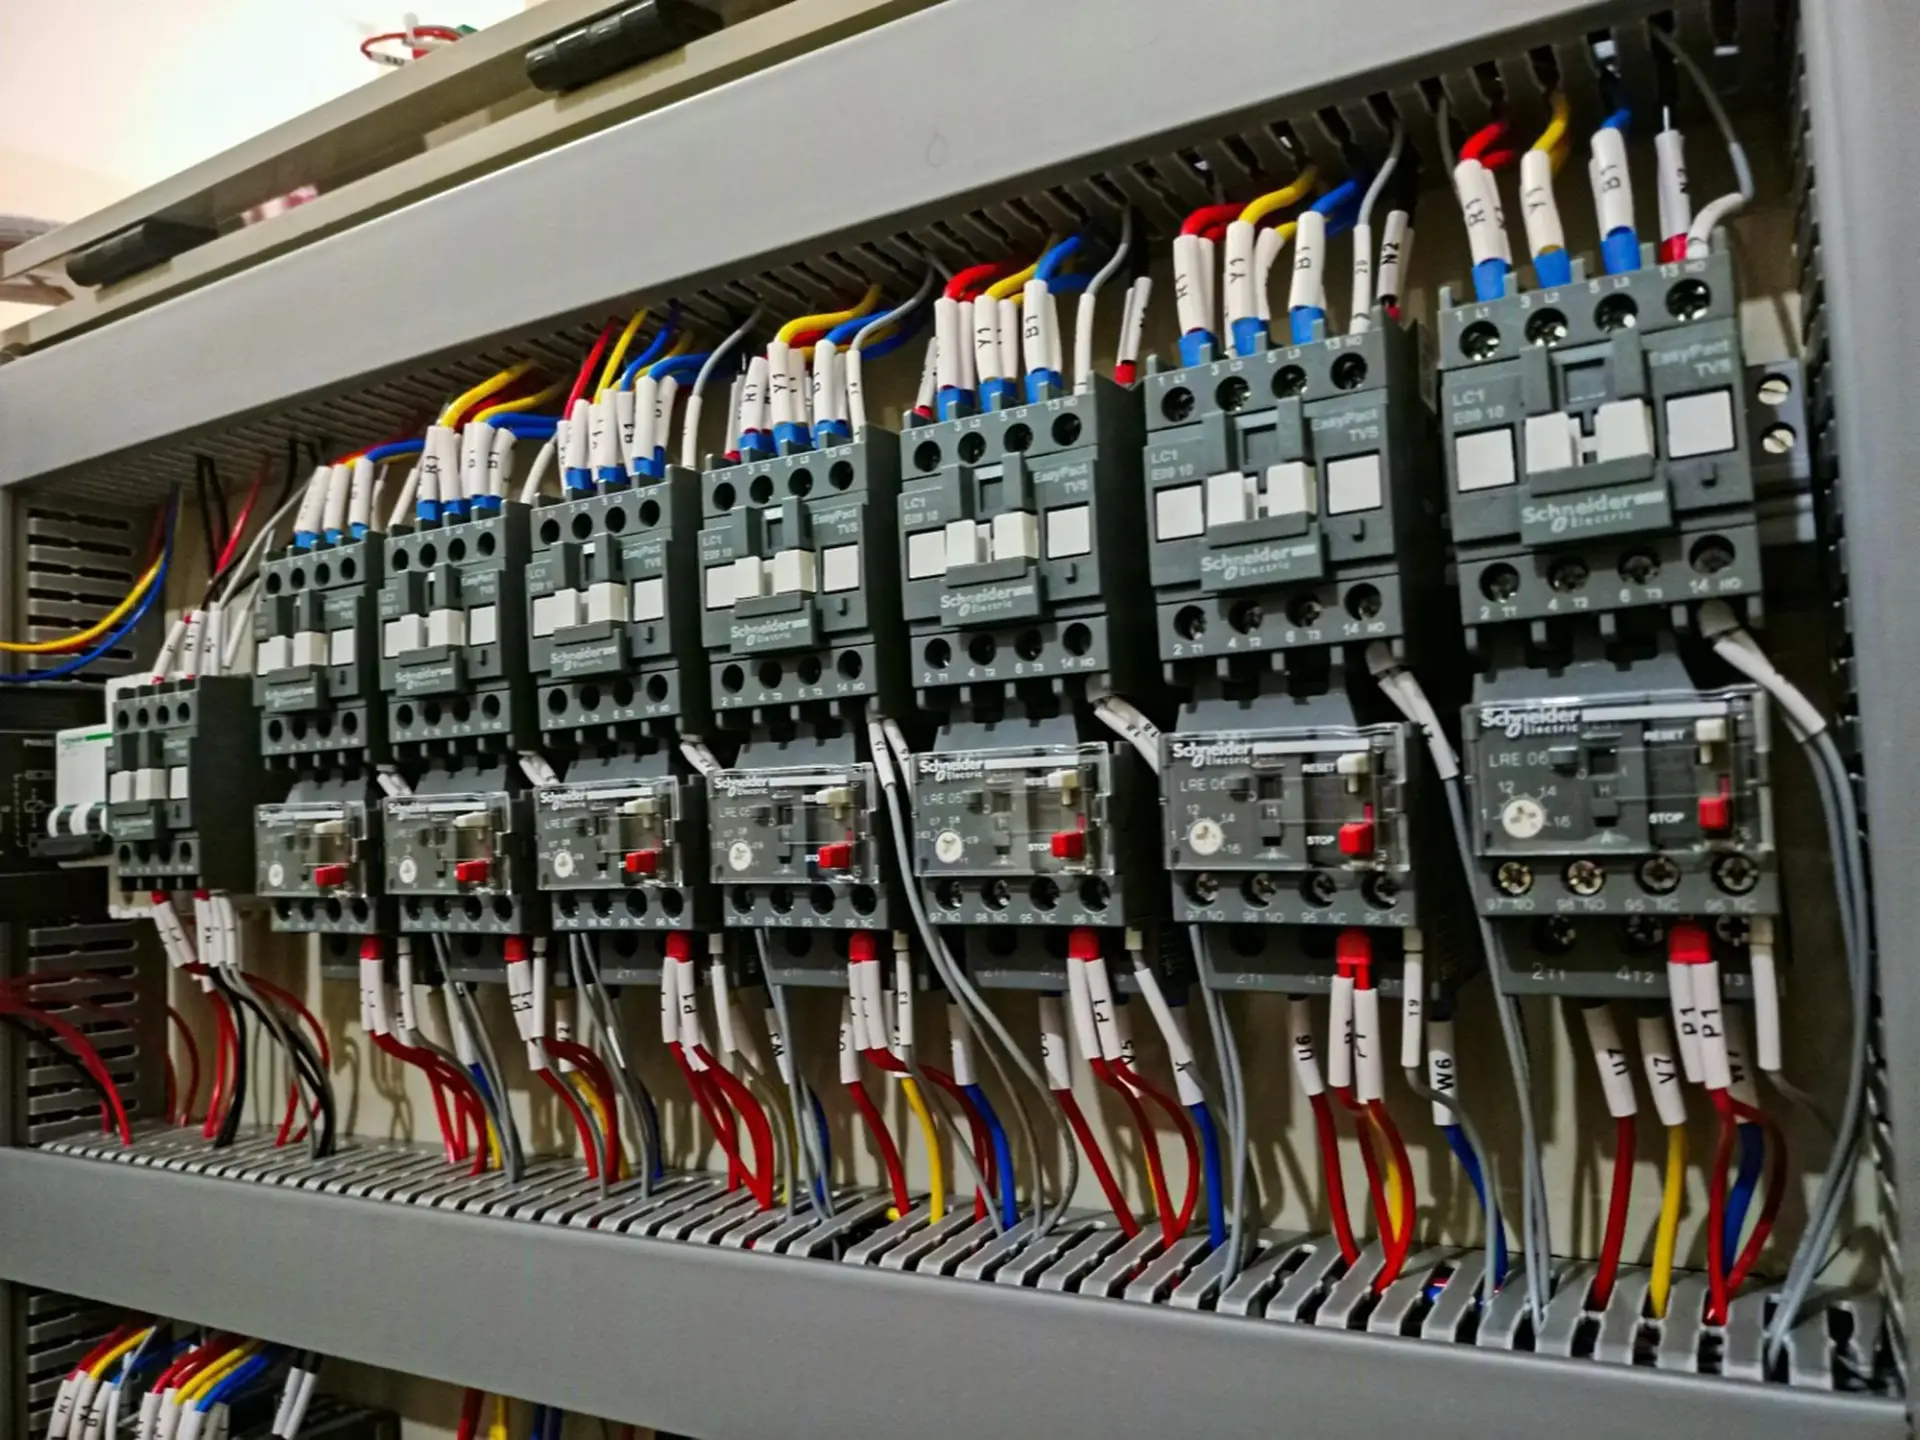
Understanding Control Panel Schematics
A schematic shows the logic of operation, while a wiring diagram shows the actual physical connections.
Example:
- Schematic → Green push button starts the motor, red push button stops it.
- Wiring Diagram → Shows which terminal of the push button connects to which terminal of the contactor.
You should practice both, because in the industry you will see both types of diagrams.
Drawing VFD & Soft Starter Control Panel
Watch this third video
When working with motors that need speed control or smooth starting, you will use either:
- VFD (Variable Frequency Drive) → controls motor speed by changing frequency.
- Soft Starter → reduces starting current for smooth acceleration.
Key Points for VFD/Soft Starter Drawings
Show the incoming three-phase power connected to MCCB/fuses.
Connect MCCB output to VFD input terminals (R, Y, B).
Show motor connected to VFD output (U, V, W).
Add start/stop push buttons in the control circuit.
Include overload protection and earthing.
This type of drawing combines both power wiring and control wiring.
Tips for Students and Technicians
- Start with simple circuits like DOL starters.
- Learn and memorize basic electrical symbols.
- Practice by redrawing textbook diagrams.
- Compare your diagram with a real panel if possible.
- Use pencil and paper first before trying CAD software.
Common Mistakes to Avoid
- Mixing schematic with wiring diagram.
- Forgetting protection devices like fuses or overload relays.
- Not numbering wires.
- Not showing the control supply voltage.
- Confusing power circuit with control circuit.
Hands-On Practice is required
Remember: Reading books is not enough. You must draw and wire circuits yourself. Hands-on practice will:
- Improve your speed in reading diagrams.
- Help you troubleshoot panels in real life.
- Prepare you for industrial jobs.
That’s why we have made these free YouTube videos to give you practical training that feels close to real panel work.
What We Learned here?
In this blog, we covered:
- Why electrical & control drawings are important.
- How to read wiring diagrams.
- How to draw electrical diagrams step by step.
- Difference between schematic and wiring diagram.
- VFD and soft starter control panel drawings.
Now it’s your turn—watch the videos, pause them, and practice drawing on paper.
With every diagram you create, your skills will grow.


I hope you like above blog. There is no cost associated in sharing the article in your social media. Thanks for reading!! Happy Learning!!
1 Comment